



You've found the hat you love, but it drifts backward, floats above your brow, or shifts whenever you turn your head. Before you reshape the crown or retire the hat to a shelf, hat size reducer tape may offer a gentler answer. Used carefully, it makes a small internal correction while preserving the exterior silhouette, velvet lining, and carefully handled pile of a well-made hat.
At a Seattle millinery studio, we treat fit as part of luxury. A handmade hat should feel secure without feeling restrictive, and a cruelty-free design should be worn often enough to earn its place in your wardrobe. The right adjustment depends on more than circumference alone. It also depends on crown shape, lining, skin comfort, and whether you're working with a structured velvet piece or a plush high-end faux fur style.
When a Beautiful Hat Sits Just a Little Too High
The first sign of a loose hat is often subtle. You place it on your head, admire the rich-toned shape in the mirror, and notice that the front edge won't stay where you set it. A small movement sends the hat toward the back, leaving the brow exposed and the crown sitting higher than intended.
That's where hat size reducer tape can help. The material occupies a little space inside the sweatband or crown, reducing the usable internal circumference without permanently reshaping the hat. For a hat that's only modestly loose, this is usually kinder than stitching a new sweatband, altering the lining, or blocking the entire crown.

Modern hat sizing is circumference-based. A size 57 corresponds to roughly a 57-centimeter head measurement, while a commonly cited average adult circumference is about 56–57 centimeters, or 22–22.5 inches (Southern West Virginia University's hat measurement guide). That system makes production more consistent, but it can't account for every brow, temple, occiput, or crown preference.
Start with the gentlest correction
Before applying anything, decide whether the hat is too large or sitting incorrectly. Put it on with the sweatband level, move naturally, and notice whether the hat shifts evenly or gaps at one particular point.
A removable strip is a sensible first step when:
- The hat is only slightly loose: You need stability rather than a new size.
- The hat is valuable or delicate: A reversible correction protects the original construction.
- The piece is seasonal: You may want to remove the adjustment when wearing different hair or lining layers.
- The hat has a velvet or faux-fur finish: Permanent reshaping could disturb a silky pile or architectural profile.
A well-fitted piece lasts longer because you'll reach for it. That principle sits at the heart of cruelty-free luxury, whether the material is velvet, a luxury textile, or high-end faux fur. In our local studio, handmade work and small-batch production are built around that relationship between wearer and object. The work carries 25+ years of design experience associated with Leigh Young's Seattle millinery legacy, and small fit corrections remain part of making a hat feel personal.
The decision comes next. Is the issue circumference, crown depth, or the way the hat's interior meets your head? The answer determines whether foam, adhesive, a partial strip, or a professional adjustment will serve you best.
Measuring Your Head the Right Way
A reducer can only correct a measurement taken at the correct hat line. Use a flexible, non-stretch tape and place it just above the eyebrows and ears, around the fullest point at the back of the head. Keep the tape level, snug, and comfortable. It shouldn't compress the head, and repeating the reading helps reveal an inconsistent angle (Saffron Millinery's measurement guidance).
Stand near a mirror if possible. Check the front and back while keeping the tape at the position where the hat will sit. If you don't have a soft tape, wrap a non-stretchy string around the same line, mark the overlap, and measure the string against a ruler.
Write down your head measurement, then compare it with the hat's actual interior. Don't rely on the label alone. A hat marked 57 may fit differently from another 57 because of the block, sweatband, lining, and internal construction.
| Measurement Band | Head Circumference | Common Feel | Reducer Tape Suggestion |
|---|---|---|---|
| Small | 54–55 cm, 21¼–21⅝ inches | Hat may feel loose if the labeled size is larger | Begin with a short, partial strip |
| Medium | 56–57 cm, 22–22⅜ inches | Often a secure fit in medium sizing | Use a small correction only if movement remains |
| Large | 58–59 cm, 22¾–23⅛ inches | A smaller hat may pinch at the temples | Don't use reducer tape to solve a tight fit |
| Extra-large | 60–61 cm, 23½–24 inches | Needs adequate crown and band room | Consider custom sizing before adjusting |
The chart intervals above are drawn from a published hat-fitting size chart. If your head measures smaller than the hat's interior by a modest amount, test one strip before adding more. Your goal isn't to create compression. It's to stop movement while keeping the sweatband comfortable.
For readers who work with headwear for events, uniforms, or outdoor activities, a practical overview of golf hat customization can also help clarify how personal measurements affect a finished hat. For a more detailed millinery method, keep Pandemonium Millinery's guide to measuring hat size beside your tape measure.
Circumference Versus Shape
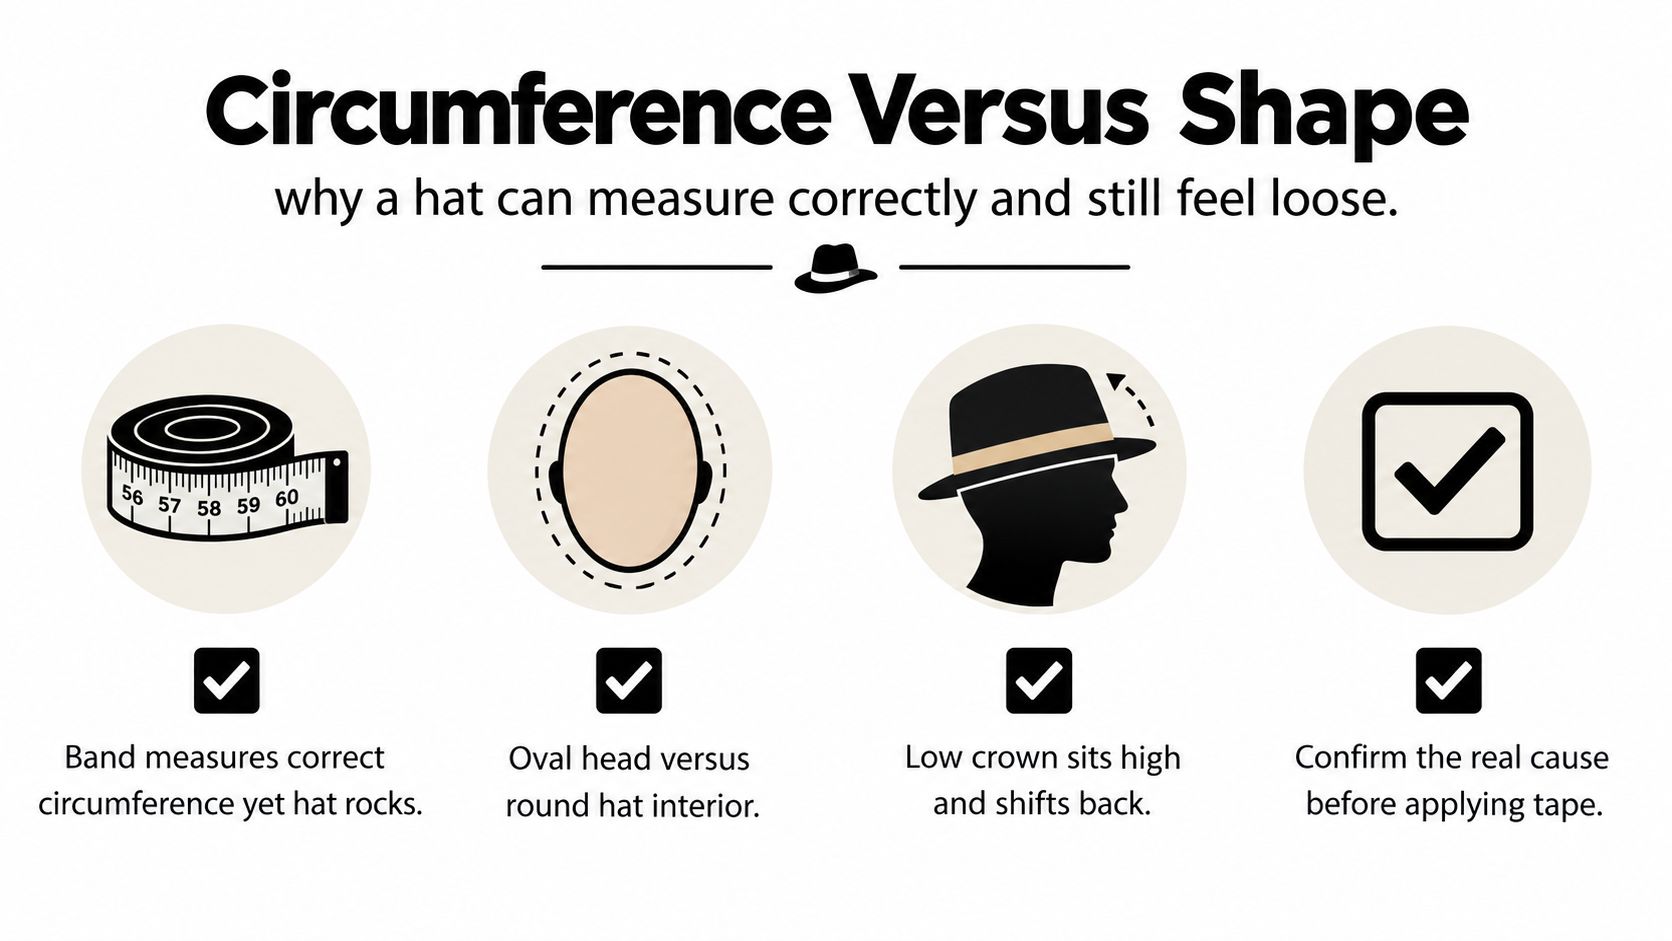
A hat can match your circumference and still fit badly. It may rock from front to back, pinch at the temples, or sit unevenly because the interior shape doesn't reflect the shape of your head. Tighter isn't automatically better, and adding tape to a shape problem can turn mild instability into a pressure point.
Published hat-pattern research treats the forehead, ears, occiput, and back of the skull as separate anatomical reference points, which helps explain why circumference alone can't predict comfort (research on hat-pattern development).
Use a calm indoor fit test
Wear the hat indoors for 10–15 minutes. That gives the sweatband and crown time to reveal problems that a quick mirror check can hide.
Check these points:
- Front-to-back stability: Does the hat slide backward when you lower your chin or turn your head?
- Temple comfort: Are the sides pressing while the front and back feel loose?
- Crown depth: Does the crown sit above the brow because its depth is wrong rather than because the band is too large?
- Contact pattern: Does the sweatband touch evenly, or does one area carry all the pressure?
- Gentle tug test: With two fingers, lift the brim slightly. The hat should resist movement without clamping down.
An oval head inside a round interior may need support at the front and back, while side placement could worsen temple pressure. A shallow crown may sit high even when the band feels secure. In either case, more tape won't create the correct block.
Standardized sizing helped milliners produce and sell hats consistently, but it never removed anatomical variation. When the problem is shape, a different block, custom blocking, lining adjustment, or bespoke sweatband work will usually outperform a thicker internal insert. You can find more detail on the relationship between measurement and fit in this guide to head circumference and hat size.
Fitting rule: If the band feels tight in one place while the crown still moves, stop reducing the circumference. Investigate the shape.
Placing Tape Inside Velvet-Lined Crowns
Velvet-lined crowns reward a light hand. Before you touch the adhesive, turn the hat over and identify the sweatband, the nap of the velvet, and any faux-fur trim that could catch beneath your fingers. Don't drag a fingernail across the pile, and don't flatten plush fibers with repeated rubbing.
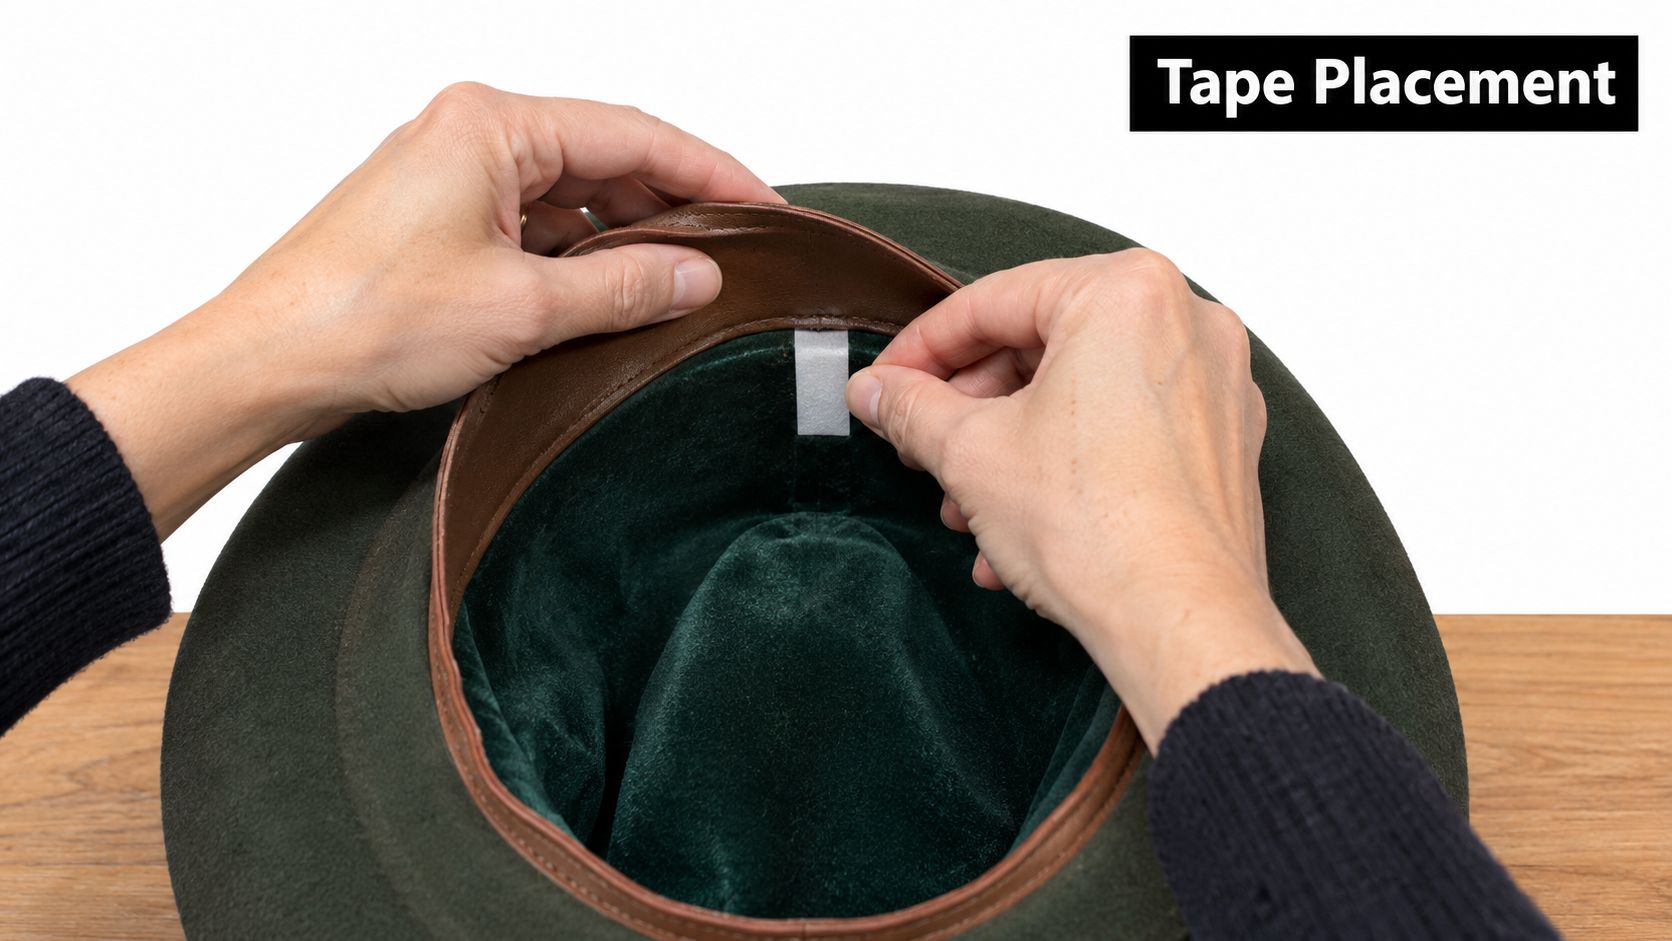
A faux-fur pillbox is a useful example. Its shallow crown makes placement visible quickly, and an off-center strip can make the hat tilt instead of settle. Start with the smallest intervention.
A careful placement sequence
- Dry-fit first: Place unbacked foam beneath the sweatband and try on the hat. Mark the area where the gap appears.
- Lift the band gently: Use your fingertips to ease the sweatband away from the lining. Avoid pulling against stitched points or catching the velvet pile.
- Choose the anchor: For a balanced correction, begin at center back. If the head is elongated and the hat gaps at the front and back, use short opposing sections rather than one long strip.
- Keep the strip relaxed: Don't stretch the material as you apply it. Stretching can create uneven tension and a lumpy interior.
- Peel progressively: Anchor the centered starting point, then remove the release liner gradually while pressing the strip into place. This technique is also recommended in published placement guidance for reducer tape.
- Press the full length: Use firm, even pressure along the strip, keeping adhesive away from exposed velvet whenever possible.
A single strip commonly reduces internal circumference by approximately 1 cm, or about one-half hat size, according to that placement guidance. Two strips at opposing points can create a larger, more balanced reduction. Reserve full-perimeter application for a hat that is substantially oversized, not for a piece that merely shifts during a walk.
Give the adhesive time to settle, then try the hat again without pressing the crown down. If the pile has been disturbed, use the care approach in this velvet hat care guide, working with the nap rather than against it.
Here's a visual demonstration of the hand position and progressive release method:
The finished interior should feel smooth beneath the sweatband. If you can feel a ridge, remove the strip and reposition it before wearing the hat outdoors.
Comfort, Adhesive Safety, and Removal
Reducer tape spends hours against warm skin, hair, perspiration, and sometimes hair products. A strip that feels acceptable for a quick fitting can become irritating during a long commute or an event, especially beneath a close-fitting crown.
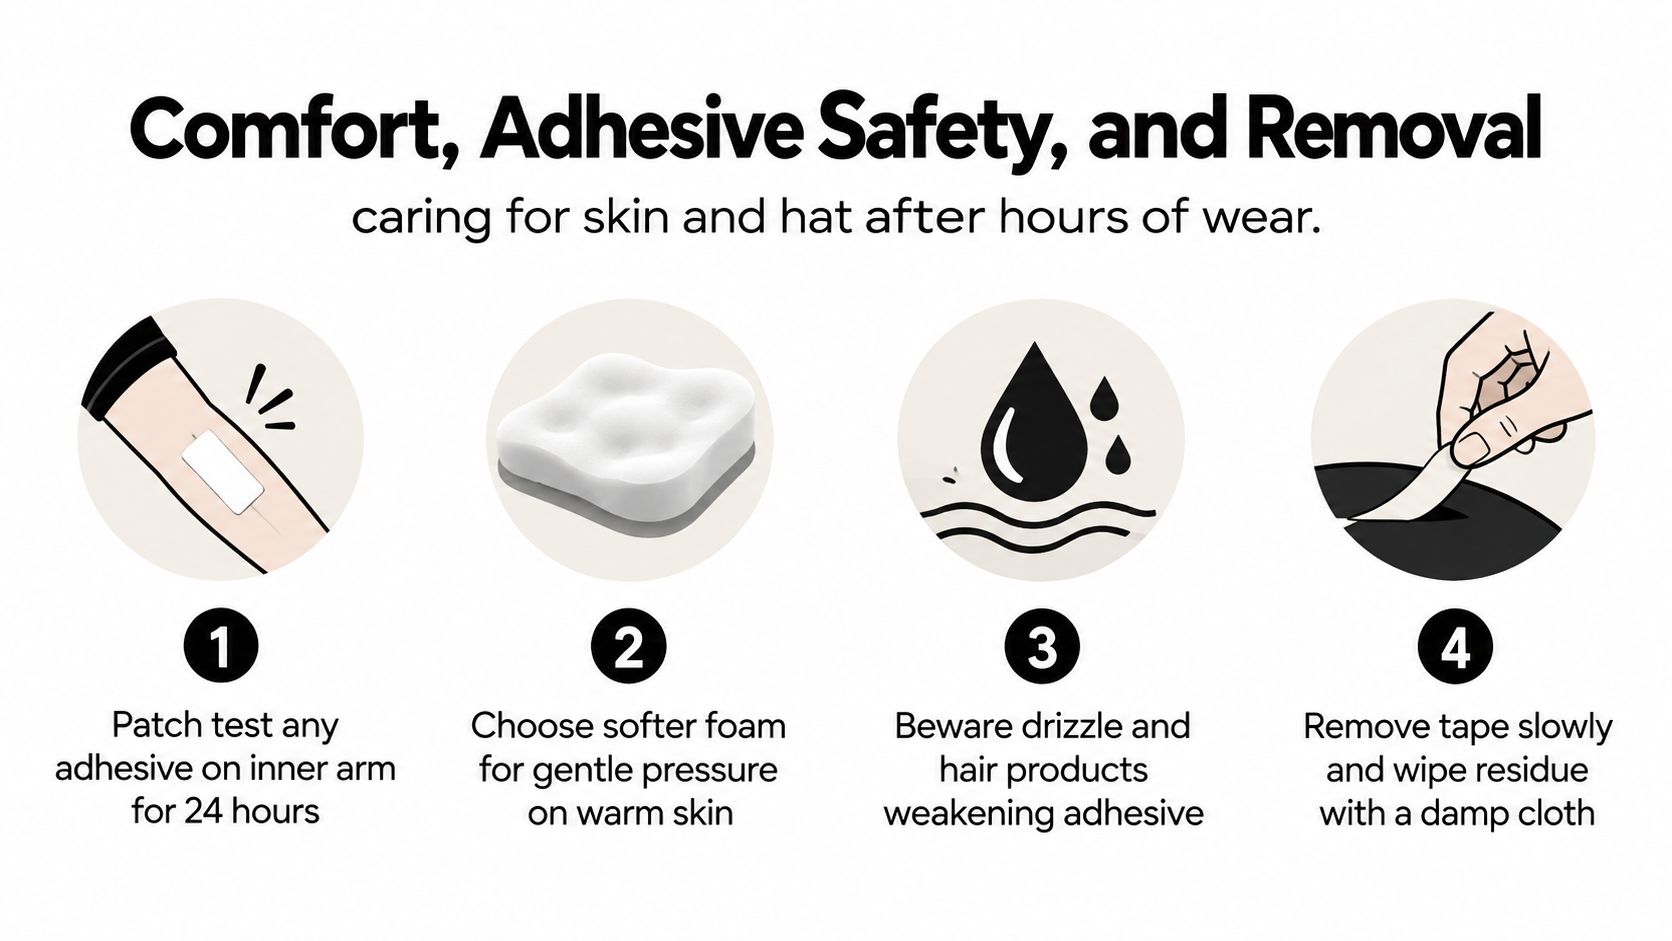
Patch-test the adhesive before committing it to a finished hat. Place a small amount on the inner arm and observe the skin for 24 hours, following the practical safety approach shown in the guidance below. Don't apply tape directly over irritated or broken skin, and stop using it if you notice itching, burning, redness, or persistent pressure.
Choose grip with the hat in mind
Softer foam may be preferable to traditional adhesive tape for sensitive skin during extended wear. More aggressive adhesive can hold firmly, but it may damage delicate velvet, satin, vintage grosgrain, or trims adjacent to faux fur. Those trade-offs are outlined in product guidance on hat sizing reducers.
Think about the interior and the conditions before choosing a material:
- For delicate finishes: Prefer a removable, low-commitment option and test it on an inconspicuous area.
- For warm skin: Softer foam can reduce the sensation of a hard edge.
- For damp weather: Seattle drizzle and hair products may weaken adhesive, so inspect the edges after wear.
- For long outings: Wear the modified hat indoors first and check for forehead pressure, red marks, pinching, or crown distortion.
When removing tape, peel slowly and keep the motion parallel to the sweatband rather than pulling sharply upward. If the adhesive resists, pause rather than tearing at the fabric. Remove residue with a lightly damp cloth only when the material allows it, then use a soft lint brush to reset the surface.
Replace a strip when its edges lift, collect moisture, or begin to feel rough. Reducer tape is a temporary, adjustable fitting aid, not a permanent substitute for correct sizing. It should make the hat more wearable, not conceal an unresolved construction problem.
Reducer Tape Versus Inserts and Professional Blocking
Choose the correction by looking at the hat's shape, lining, skin contact, and intended use, not circumference alone. A narrow velvet-lined crown can feel tight at one point even when the opening measures correctly, while a faux-fur finish may hide where a strip can sit without disturbing the pile.
Reducer tape fits a hat that is only modestly loose and already matches your head shape. In a velvet-lined crown, place a short strip beneath the sweatband where it supports the head without flattening visible nap. Faux fur needs the same restraint. Keep adhesive away from the fur itself and avoid building a ridge that changes the crown's balance. A partial application usually gives better comfort and control than lining the full circumference.
Removable foam inserts or sizing pads suit borrowed hats, rental pieces, and seasonal headwear. They can be repositioned as your hairstyle or layers change, and they let you test the amount of reduction before adhesive touches the lining. They also help identify whether the movement comes from one area rather than the entire opening.
Professional blocking changes the hat's structure. Choose it when the crown sits incorrectly, the head shape does not match the block, or the hat needs a true bespoke fit. The work takes more time and may cost more, but it corrects the crown and proportions rather than only narrowing the opening.
A hat that needs more than one strip of reduction is usually a size or block mismatch, not a taping problem. If it moves by more than a finger's width, or tape creates pressure before stability, book a milliner.
Bespoke work is the natural next step when your head, crown, lining, and intended use need to work together. Review custom hat sizes and bespoke fitting options before stacking strips inside a valuable piece.
Your Fitting Checklist and Where to Go Next
Keep this ritual beside your mirror. It's short enough to repeat and precise enough to prevent most avoidable mistakes.
The dresser-side fitting ritual
- Measure at the correct hat line. Place the tape above the brows and ears and around the fullest back point. Keep it level and snug, never compressed.
- Repeat the reading. Take the measurement again until the tape follows the same path and the result feels consistent.
- Inspect the hat interior. Check the sweatband, crown depth, lining, seams, and any areas where velvet or faux fur could be disturbed.
- Dry-fit the correction. Place unbacked foam beneath the sweatband and try on the hat before exposing adhesive.
- Name the problem. Decide whether you're correcting circumference, front-to-back movement, crown depth, or a localized pressure point.
- Choose the lightest option. Start with a partial strip or removable insert. Don't cover the full perimeter unless the hat is substantially oversized.
- Patch-test the adhesive. Skin comfort comes before maximum grip.
- Apply from a centered anchor. Peel the release liner progressively, keep the strip unstretched, and press along the full length.
- Wear the hat indoors. Walk, turn your head, lower your chin, and check whether the crown remains stable without pressure.
- Refine slowly. Add only the smallest increment needed, or remove the tape and consult a milliner if the fit becomes pinched.
The most useful observation is often the one you make after several minutes. A hat that looks perfect in a still photograph may reveal a front gap, temple pressure, or uneven crown contact once you move through a room. Don't judge success by tightness. Judge it by secure, even contact without pain or distortion.
For readers drawn to local craftsmanship, the story of handmade millinery in Seattle offers helpful context for what a professional fitting can preserve. A skilled milliner considers fabric, block, lining, sweatband, hair, and the way the finished hat should sit on the wearer.
That same care matters when the material is an ethical alternative to animal fur. High-end faux fur can be plush, weather-resistant, and beautifully substantial, but its pile and backing need thoughtful handling. A hand-sewn hat should never be forced into a shape that compromises the textile.
Pandemonium Millinery's Seattle studio has spent 25+ years developing artisanal accessories with Leigh Young's design legacy, small-batch production, and bespoke services at the center. For a custom piece, the studio's approach is simple: your fabric, our expertise. That can mean custom sizing, bespoke alterations, or a one-of-a-kind millinery commission made around the wearer rather than a broad size label.
The fitting decision can stay practical:
- Choose reducer tape for a modest, reversible circumference correction.
- Choose foam inserts when removability and flexibility matter most.
- Choose professional blocking when the crown or head shape is the true issue.
- Choose custom sizing when you want the hat designed correctly from the beginning.
Join The Crowd for 15% off and early access to small-batch drops, then explore the current high-end faux fur and velvet-lined hat collections for a piece that can be fitted with the same care as the rest of your wardrobe.
If your favorite hat needs more than a gentle internal correction, Pandemonium Millinery offers custom sizing, bespoke millinery, and your fabric, our expertise services from our Seattle studio. Visit Pandemonium Millinery to explore cruelty-free luxury, hand-sewn faux fur, and carefully fitted hats made to be worn for years.


